I have always been doing point and shoot when taking photos for my blog and travel articles, so a camera’s manual settings were foreign to me. Most of the time, point and shoot suits me, but sometimes, when I look at a shot that could have been done better, I realized that it wouldn’t hurt to learn some basic photography.
So, when a friend arranged for me to attend a basic photography workshop organized by the Federation of Philippine Photographers Foundation (FPPF), I happily took the chance. It was a challenging but fun five-day workshop held in Intramuros, a perfect setting for photography.
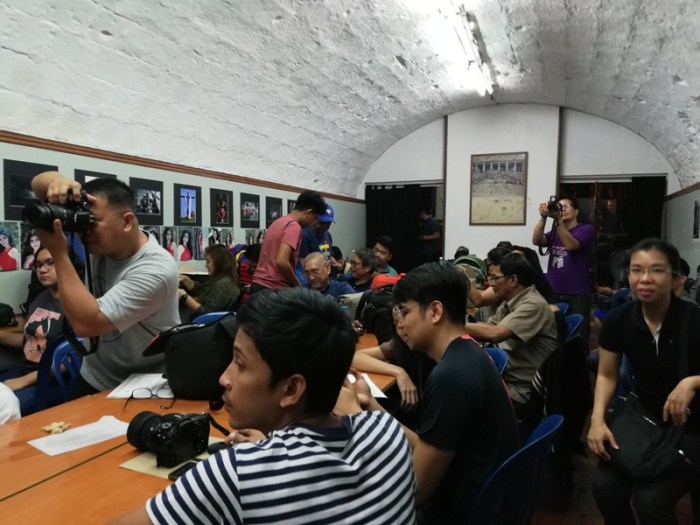
Our basic photography workshop organized by the Federation of Philippine Photographers Foundation (FPPF) was held in Fort Santiago, Intramuros. (All classroom photos taken by my smartphone for documentation – not thinking of photography techniques here hehe)
While the different photographer-instructors taught many concepts and principles which we would later apply in shooting exercises and assignments, below are the lessons that really stuck with me.
1) Set your camera’s ISO, aperture, and shutter speed, to get the shot you want.
Finally, after doing point and shoot for so long, I was happy to be introduced to the settings I could adjust to take the photo I want. Borrowing a friend’s mirrorless camera in the meantime while I have yet to decide on buying my own, I got to have a basic understanding of aperture and shutter speed. I already understood ISO a bit, but I was able to even understand it better in the context of aperture and shutter speed. ISO is the exposure, aperture is how wide the camera’s lens can open, and shutter speed, as the term states, is the speed of the camera’s shutter. All three would influence the lighting in whatever photograph I take.
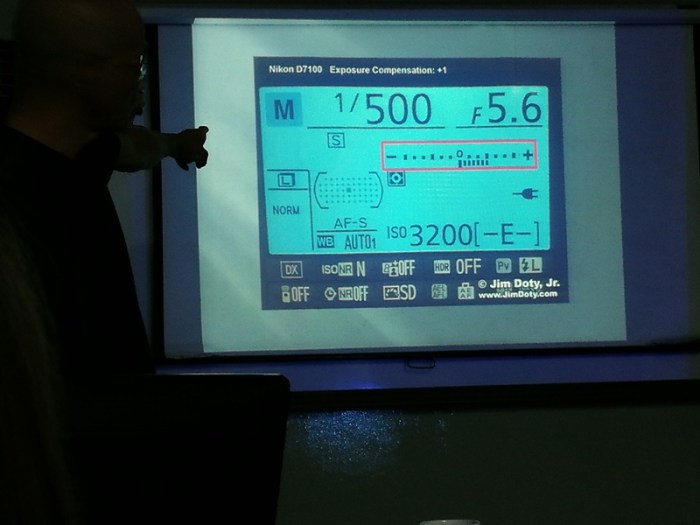
Finally got to understand most of these figures here.
Shutter speed also influences the appearance of motion in photography. A high shutter speed would freeze subjects in motion, like an athlete running or biking. Adjusting shutter speed to capture movement continues to be a challenge for me and would still need lots of practice.
It is aperture that I was most fascinated with and was happy to experiment with most during workshop assignments. I learned a narrow aperture would make a subject sharp and blur the background (perfect for portraits). A wider aperture, meanwhile, would capture all the details from foreground to background (perfect for landscapes).
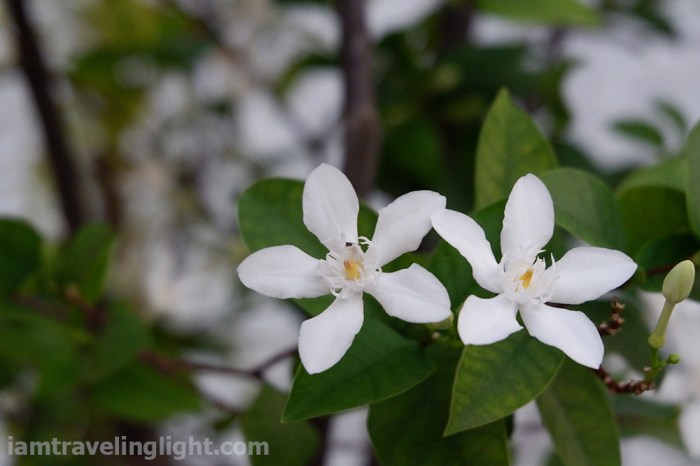
Part of our first photography assignment with the theme “What Grows.” I shot this with an aperture of f 5.6. All photos we shot for assignments could not be post-processed, except for cropping. I later just included a watermark for this blog.
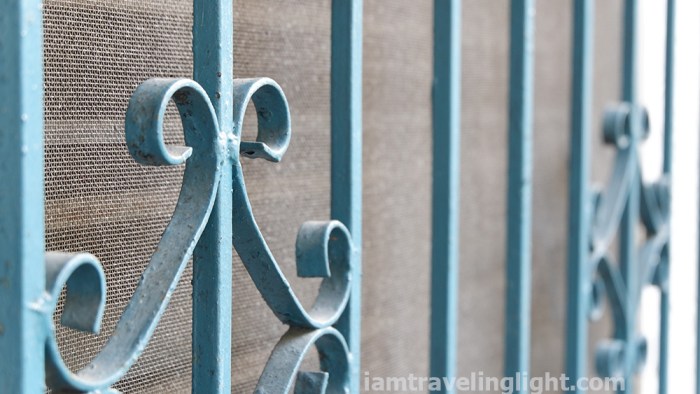
Also shot at f 5.6, these window grills were fun to shoot for the theme “Lines and Shapes.”

Shot this at f 4.5, for the themes “What Strikes Me” and “Lines and Shapes.” As this is a close-up of a leaf, I could not figure out how to do more blurring of the leaf surrounding the dew drops.
The class gave us students some basic settings for particular photos, and even a cheat sheet for subjects moving at different speeds. Even with the guide and the principles in place, though, it still takes practice to set your camera just right for the photo, especially with these three settings involved.
2) You can set the colors of your photos even before taking them
Well, not all colors – or rather, not all colors will take on a different individual color, but the photo’s general color can change. There is such a thing as white balance which you can adjust, for example, to make the sky as blue as it appears when you look at it, or to make a person’s skintone look like its natural color in the photo.
While I am familiar with the settings like “daylight” and “fluorescent” in my point-and-shoot camera, I learned that you can adjust for white balance manually. There is a setting for adjusting color temperatures (Kelvin) and a grid that can take your photo closer to red, magenta, yellow, green, or blue. You also need to manually adjust and meter your camera to capture the right skintone. I also learned that the typically brown skin of the Filipino is a perfect benchmark for metering for skintone!
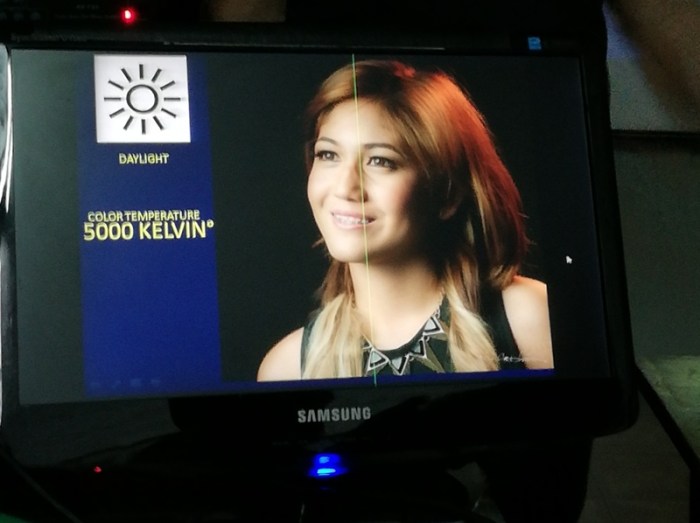
During the class, examples like this were shown in adjusting white balance. Here, the white balance was adjusted for skintone.
3) Don’t forget composition
Using my point-and-shoot camera, I was able to learn and practice composition mainly by looking at travel photos and wrote about what I learned here.
While I attended the FPPF basic workshop more for the technical aspects and settings of the camera, I also appreciated the tips on composition, like keeping the photo simple and avoiding clutter. It also pays to review traditional principles, like the rule of thirds. Using a borrowed camera and not being able to turn on the grid lines and focusing too much on adjusting ISO, aperture, and shutter speed, I later realized that some of my photos were not aligned with the rule of thirds.
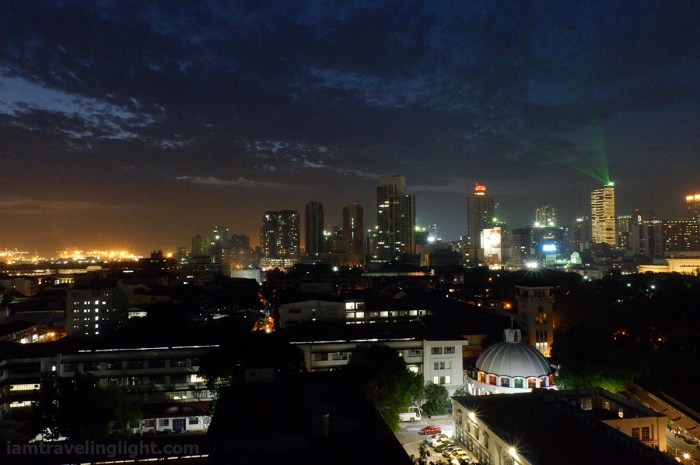
My entry for the “Landscape” theme for the workshop’s last assignment and photo contest. This is the view from one of Intramuros’ buildings. Concentrating too hard in adjusting ISO, aperture, and shutter speed in this night shot (I indeed learned firsthand that night photography is no easy feat!) and forgetting to turn on the grid lines I am used to, I missed the rule of thirds here.
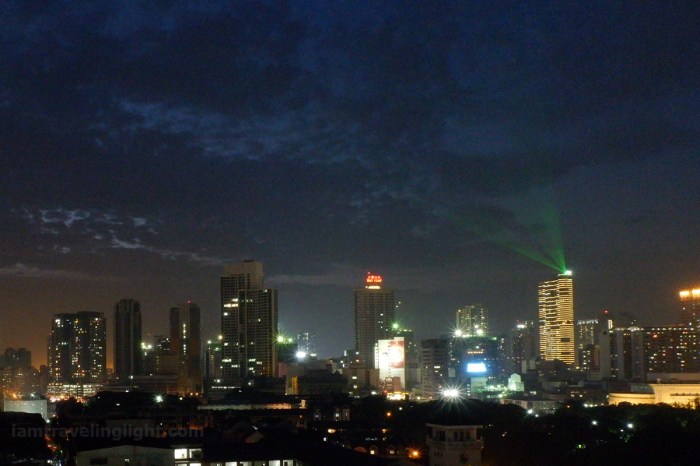
I sought feedback from an instructor, Mr. Amir Alba, after the workshop and he suggested to crop the photo. This is an approximation of his cropping suggestion. He also suggested the cropping to remove the dead black space in the foreground of my photo. After cropping, though, the photo is blurred, so have to work on my night photography still. I may have to buy a tripod, too!
For anyone who is yet to get familiar with composition, FPPF’s basic photography workshop covers the fundamentals.
4) Some photos need certain lenses and equipment
There are beautiful photos I see online that are the kind that I would like to shoot myself, too. Through this workshop, though, I learned that some photos do not just require skill but also certain equipment.
The photos I see, for example, with the very sharp subject and dramatically blurred background require a special lens for portrait. The camera’s kit lens, while it can blur the background, can only do so up to a certain extent.
Meanwhile, a street scene with a wide angle also needs a special lens for wide-angle photography.
The instructors also talked about other equipment like reflectors and diffusers when shooting under harsh lighting, filters for color and texture, among others. They are saying these especially for those who are considering photography as a profession. And, among my classmates, there are those planning to pursue it as a profession.
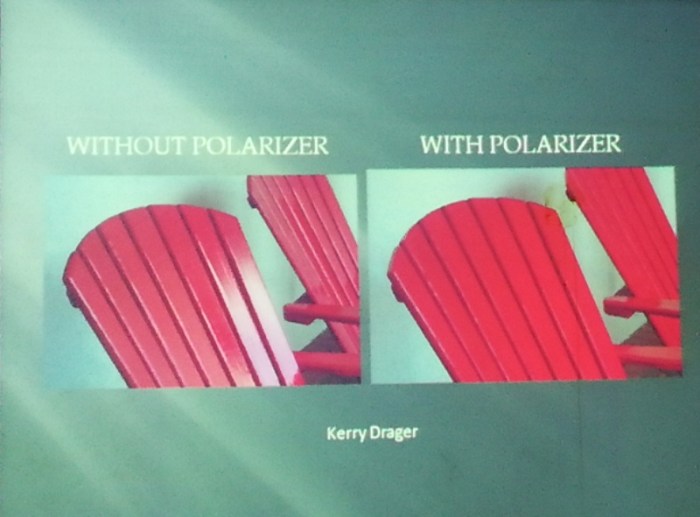
There are camera equipment or add-ons like the polarizer which removes glare in photos.
The camera’s kit lens, though, can already do a lot, I found out – no need to buy anything else! But if you are dreaming of a particular shot that is only achievable with the help of certain equipment, you can invest in those if you like.
There are also basic equipment like a tripod which is recommended for night photography.
5) You can still save or improve your photo through post-processing
I have only ever done minimal editing (brightness, shadow, highlights, and color correction if necessary) through Photoshop, and I have been hearing of Lightroom but this is the first I have seen it in action. It is simpler to use than Photoshop, and I might give it a try.
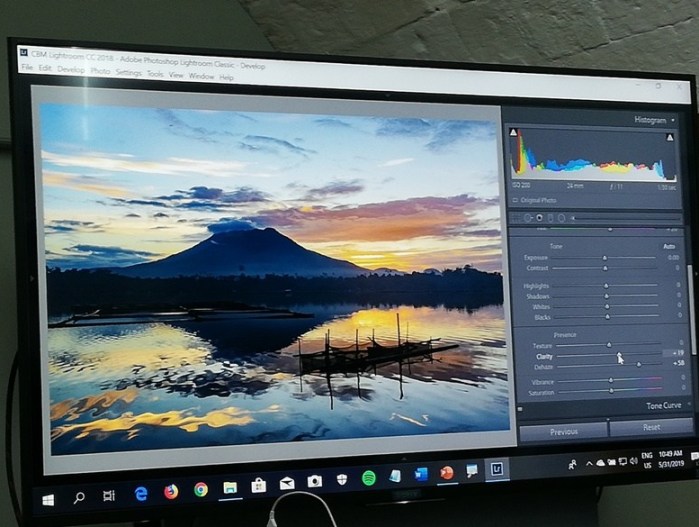
The instructor here brought out the photo’s natural colors through Lightroom.
I also learned that to have more detailed editing and greater chances of photo correction later on, it is best to shoot in RAW to preserve much of the photo’s data. The files would be just larger, but best to do it if you need it.
6) Practice, practice, get feedback, and don’t forget to have fun!
During my and my classmates’ graduation, FPPF Chair Eduviges Huang pointed out the importance of passion and having fun in photography. I could not agree more. While it is challenging, I realized that I took more time in subjects and settings where I had the most fun. Even after the workshop, I tried to shoot during my free time.
I know it would take a lot of practice, though. Out of the hundreds of shots I took, only a small number somehow passed if I would look at them critically – and they still need improvement! It was fun shooting them, though.
And, don’t forget to get feedback from professional photographers if you can, too! I was happy to get feedback from Mr. Amir Alba about my last two assignments for the workshop.
Here are some shots where I had the most fun.
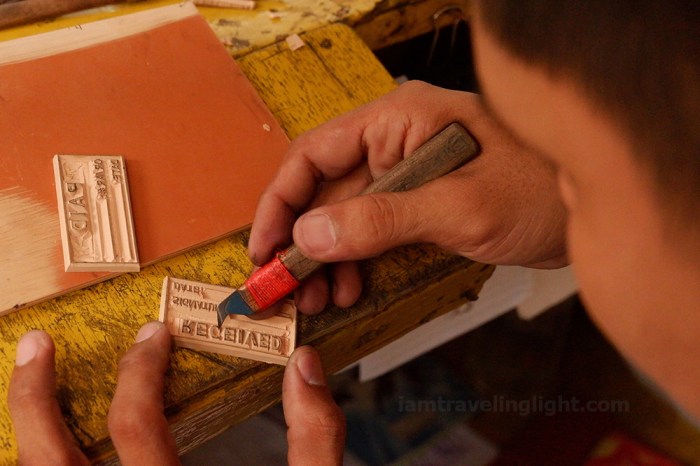
This was shot for the last assignment and also the photo contest, with the theme “Human Activity.” I was walking along Makati after an appointment when I saw this man, Kuya Onassis, making rubber stamps. He gamely agreed to my photo requests. Later, I learned from Mr. Amir Alba that I could do better in this shot by showing the whole left hand, possibly even up to the elbow.
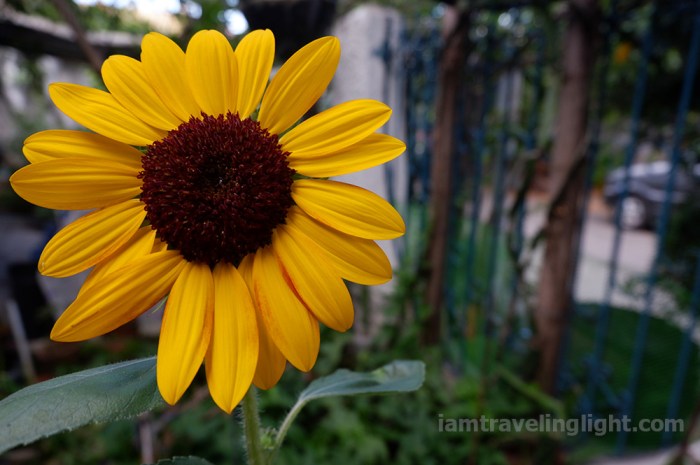
I love sunflowers! When one finally bloomed in my family’s garden after many planting attempts, I just had to take photos.

I missed the portrait session in the basic photography workshop because of a prior appointment in Makati, but I tried my hand at a sort-of portrait after the workshop. Both the subject and fire trees in general are close to my heart, so I enjoyed taking this shot!
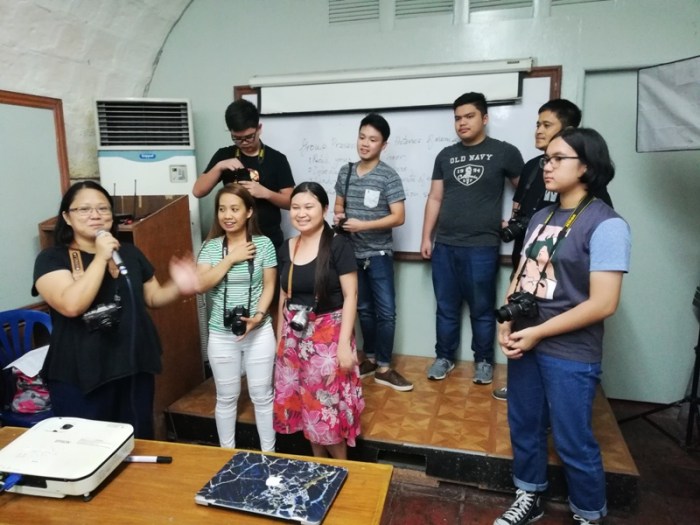
The photography workshop itself was fun, especially the last day. Our class was divided into groups who each made a special cheer and introduced the group members and their photos for the last assignment. Each group had to be named after a photography term. We named ours Kelvin (for the color temperatures!) and we had a fun cheer along the lines of “We’re hot! We’re cool!”
Our Team Kelvin group after the cheer
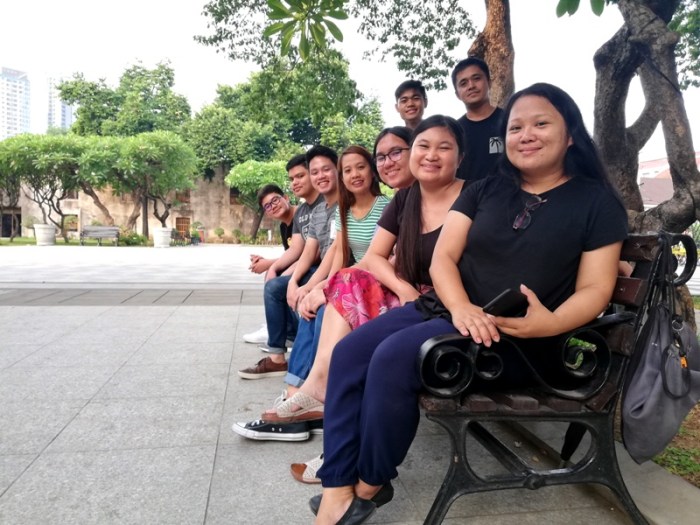
The complete Team Kelvin! On the foreground is our group leader, Armela.
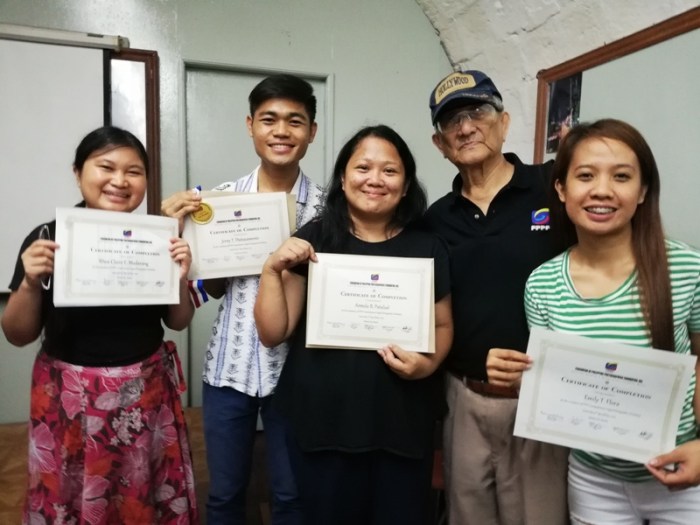
With FPPF Project Director Lito Beltran. We are proud to have our certificates! Also on this photo (second from left) is our friend Jerny, who won the landscape photo contest.
FPPF’s 5-day Basic Photography Workshop is held usually every month, with schedules on weekends, and a few on five consecutive weekdays (This is the one I took). Fee is a reasonable P5,000. You can take a look at the upcoming class schedules on their website.
What’s also amazing is that you can sit in on the class again for free within one year after taking it, or take a day you missed the first time you attended the workshop. For example, I missed Day 4’s portrait photography session on an actual model because of a prior appointment, so I can attend that day in a future class if I wish, as long as I do it within one year of attending the workshop.
In the meantime, I will practice what I learned.


Both the subject and fire trees in general are close to my heart, so I enjoyed taking this shot! — AYIIIIIE hahahahaha